The chances are that if you own a PS4, at some point you’ve wondered, why is my PS4 fan so loud? Certain games can make the console sound like it’s about to take off, and a loud fan noise can be concerning if it goes on for too long.
Well, in this article, I’ll explain why the PS4 has such a loud fan. After explaining that, I’ll suggest a PS4 loud fan fix or two that should, hopefully, quieten your console a little.
Why Does My PS4 Make Noise?
In all ways that matter, a PS4 (or any games console) is basically a computer. It has all the same functional components as a computer, but its operating system limits it to playing games with some video and music streaming capabilities. If you really wanted to, you could probably launch a word processor on a PS4!
But for our discussion, we’ll focus on the fundamental parts that a PS4 shares with a computer. These are the CPU, GPU, (and GDDR RAM). As in a computer, the CPU and GPU have thermal paste applied, which transmits heat through the heat pipes to the heat sink. A blower (fan) then pushes this out of the PS4 in exactly the same way as a computer works.
If you’d like to know more about how cooler fans work in computers (which is the same process here), check out my article on quiet CPU coolers. It contains everything you need to know about the cooling process.
Also, for a further explanation of heat sinks and fans, check out my article on active and passive GPU coolers.
The Impact of Games on Heat Production and Loud Fan Noise
Computer games will typically be CPU or GPU intensive, but some will be a mix of both. If a game is GPU-bound, it has impressive graphics, resolutions, and framerates. If a game is CPU-bound, it generally has lower-quality graphics but a larger environment or more ‘going on’ at once.
On a PC, it’s easier to figure out whether a game is CPU- or GPU-bound. If nothing else, you can check this by looking at the task manager. Of course, on a PS4, you don’t have this luxury. That said, it’s not super important to know the difference. The important thing is that demanding games make the console work harder, in turn producing more heat.
Some examples of games that’ll make your PS4’s GPU work hard include:
- The Witcher 3
- Horizon Zero Dawn (and Forbidden West)
- Assassin’s Creed Odyssey and Origins
- FF7 Remake
- Uncharted 4
On the other hand, Minecraft is one of the best examples of a CPU-bound game. The graphics aren’t too intensive, but the game runs loads of functions and generates an almost infinite world. On a PC, Minecraft needs at least 8GB of RAM, which sounds like a lot when you look at the game. No Man’s Sky is another good example of a CPU-bound game for the same reasons.
PS4 Noise Levels
A PS4 will always make some noise as part of its normal functioning. In rest mode – or when playing low-intensity games – the fan won’t be too noticeable. As with gaming on a PC, your TV volume should drown out normal fan noise. You can expect it to sit around 30-40dB when operating normally.
You might find your PS4 making more noise than normal for the following reasons:
- Dust in the fan ports
- Not enough clearance for air circulation (e.g. keeping the console in a cupboard)
- High-intensity games
One blogger did a test of PS4 fan noise levels for intense games and found that No Man’s Sky could hit an impressive 62.2dB! This is the equivalent of normal conversation, which is fairly loud for a small fan in a game’s console.
However, what won’t create more fan noise is the PS4’s HDD or SSD working. It’ll heat up when accessing data, but this won’t create more fan noise. Just like if you plug an external hard drive into your PC, it gets hot, but never hot enough to justify activating fans.
Generally, a PS4 fan shouldn’t vibrate. As such, this shouldn’t contribute to the loud fan noise. If this happens, you should probably turn the console off, as an imbalanced fan isn’t normal in a PS4.
7 Fixes: How to Make My PS4 Quieter
When it comes to quietening your console’s fan, there are 2 categories of fixes: opening or not opening the console. Below are what I consider to be the most useful fixes depending on how much effort you want to put in.
Fixes Without Opening the PS4
1) Vent Clearance
This obviously won’t work in all situations, but it’s the easiest solution. If your PS4 is in some kind of closed cabinet, it’ll help to put it somewhere else. You want at least 12 inches of clearance around each side of the console, so it’s got a decent supply of air.
Also, having enough clearance means the heat isn’t staying around the console. In turn, it keeps the fan cool by drawing in fresh air.
A good comparison is this video below showing the thermal performance of gaming laptops with and without a laptop stand. The temperature of the GPU can decrease by 3-5 degrees C when elevated off a table. While this might not sound like much, it’s more than enough to prevent it from overheating.
You can even buy cooling stands for a PS4. Some, such as the one linked here, have built-in fans to provide even more air flow to the console. While this isn’t super necessary, it can be a helpful feature if the room is warm.
By extension, avoid any kind of dust cover or plastic cover. While you could put one over the console while it’s not in use, it wouldn’t be a good idea to keep the vents covered when gaming. As mentioned, the PS4 needs a lot of clearance around its cooling vents.
2) Vacuum Cleaner
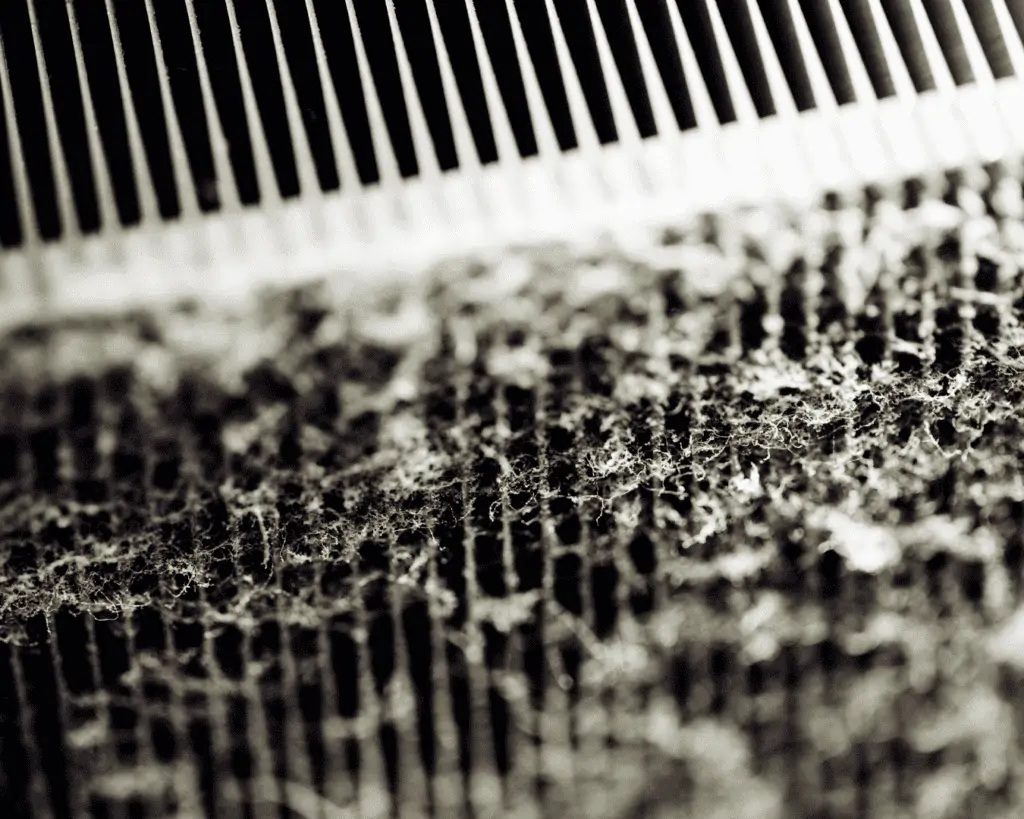
The easiest way to remove accumulated dust from the fan vents is with a vacuum cleaner. You might see online that Sony recommends doing this, but there’s no evidence in the user manual. However, running a vacuum cleaner over the cooling vents is perfectly safe.
Removing all the dust (or as much as possible) from the vents will ensure proper air flow into the console.
Accumulated dust can mean less air makes it into (and out of) the console, in turn meaning it can’t cool itself properly. To clean the vents, do the following:
- Turn off the power and remove any cables (e.g., the HDMI cable). Your PS4 must be completely disconnected from everything).
- Clean the side and rear vents with the vacuum cleaner’s narrow nozzle attachment.
- Reconnect the console and turn it back on.
If you’re having trouble removing built-up dust, you might want to try running a cloth through the vents before vacuuming. The console has indents where the vents are situated, so a cloth can help loosen the dust if you can’t get the vacuum cleaner’s nozzle in them properly.
3) Positioning
Although the PS4’s default position is horizontal, you can stand the console vertically. It helps to have a vertical stand for doing this, but it’s built to work in both positions.
However, a horizontal PS4 will give you a quieter gaming experience for several reasons. The first is that the vertical position blocks some of the side vents, meaning airflow is reduced. As mentioned above, this can impact its cooling potential, simply because it’s not getting as much air.
Also, a PS4 with a disc driver will be quieter when laid flat because this is how the drive was designed to be used. If you have a PS5 digital, it’s not something to worry about, but all PS4s have disc drives.
Generally, it works more in your favor to keep the PS4 flat. If you want to stand it vertically, consider using a cooling stand to ensure airflow is as good as possible. But you’ll also need to accept that it’ll be louder due to the disc drive.
Fixes With Opening the PS4
While it’s not necessary to have some kind of computer repair knowledge to fix a PS4, it’ll definitely help. You’ll be able to find all kinds of guides online for opening and fixing a PS4, but it’s worth doing plenty of research before jumping into this project. After all, a PS4 is basically a computer, and it requires the same kind of knowledge and delicate care.
Also, it might be obvious, but opening a PS4 will void any warranty. To really hit the point home, you have to physically remove the warranty sticker while you’re taking the console apart.
The default warranty is 1 year from the date of purchase, but you can buy an extended warranty that adds a further 3 years.
The easiest way to know whether you’ve got a live warranty is to remember when you bought the console. You have to purchase extended warranties through the PlayStation Network, so check your purchase history. If you’ve got a live warranty, think twice about whether these fixes will be worth it.
To remove all the screws, you’ll need an opening kit with at least a Torx T8 and Pho screwdriver. A pair of precision tweezers is also handy, so a kit like this would be best. Check out the video below for a quick tutorial on how to disassemble a PS4.
I recommend watching it through before going any further, but don’t start taking it apart until you’ve read the fixes below. You might find cleaning the fans does the job, and this is one of the earliest components you’ll reach.
1) Clean the Fans with Compressed Air
Once you’ve got the PS4 open, the most obvious place to start is by cleaning the fans. For this, you’ll want some compressed air (such as this). Locate the fan – this should be easy, as it looks like a fan.

Start by blowing a burst of air away from your console in case there’s any liquid in the nozzle. Next, jam the fan in place by inserting a cotton swab between some of the blades. This will stop the compressed air from spinning it too hard, which could cause damage.
Then, blow short, sharp bursts into the fan blades and the surrounding casing. It’ll be worth making your way along the air vents regardless of whether you’ve already cleaned them.
Of course, try to blow the dust out of the console rather than further in. A flashlight will help with this, as will some cotton swabs.
2) Clean the Heat Sink
Cleaning the heat sink should be done as well as cleaning the fans. The heat sink is easy to find once you’ve got the PS4 open. The fan is located inside some black housing, and the heat sink is a set of metal bars on the exposed side. It appears at 8 min 38 in this video, on the right-hand side of the picture. It looks like a grate.
As with the fan, clean the heat sink using short bursts of air. You can only blow the dust in one direction, so don’t worry about pushing it further into the console. It might help to wipe the heat sink down with some cotton wool before dusting it.
3) Replace the Thermal Paste
To replace the thermal paste, you’ll need to get to the PS4’s motherboard. While this can take a while, it’s not super difficult providing you have the correct tools. Follow the video linked above to get to the right place.
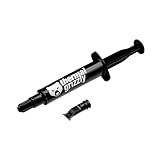
The conductivity of thermal paste for a PS4 doesn’t need to be as high as for a PC, unless you plan to overclock your console. The 2 best options are either Arctic MX-4 for standard use or Thermal Grizzly Kryonaut for overclocking. Thermal Grizzly performs up to 350 degrees C, which is more than enough for a PS4.


Once you’ve made your way down to the motherboard, wipe off the old thermal paste with a tissue. Add a blob of the new thermal paste and then put everything back together. You can follow this IFIXIT guide for visual steps on how to access the motherboard.
Thermal paste should be replaced every few years as it can begin to degrade. While it won’t directly help with fan noise like cleaning will, it’ll improve heat transfer, meaning your PS4 won’t overheat as quickly.
4. Replace the Cooling Fan
The final option is to entirely replace the PS4 fan. This is only necessary if it’s faulty, which you should be able to easily diagnose. The most obvious issue is that the fan isn’t spinning, but if it’s vibrating or clunking, you might have a faulty fan.
Of course, if your PS4 is still under warranty, a faulty fan replacement should be covered. So, check with Sony first, as it might be able to offer a repair or replacement to save you from doing it.
That said, replacing a PS4 fan isn’t super difficult. Again, you’ll need to go digging into the console to get the fan component out, but putting in a new one isn’t too difficult.
You can buy a replacement fan online, but make sure it’s suitable for the model of PS4 you own. It shouldn’t be difficult to find third-party products to fit all models of PS4, providing you’re willing to hunt around.

Rather than running through the steps here, it makes sense for me to link to another IFIXIT guide. After all, they’re pretty comprehensive and maybe the best source for repairing electronics.
As with cleaning the fan and heat sink, it’s probably worth replacing aged thermal paste if you’re in there replacing the fan. On the other hand, it’s only worth replacing the fan if it’s actually faulty. A functioning fan will only need a clean to make it quieter.
Final Thoughts on Keeping Your Console Cool (and Quiet)
If you’ve ever taken apart a desktop computer, working on a PS4 shouldn’t be too difficult. But even if you haven’t, a bit of research should help you out here. The most important thing is to be delicate with the parts.
Providing you do that, buy the right tools and follow the tutorials, very little could go wrong. And, as any computer buff will tell you, tinkering with electricals is actually pretty fun.
Have you taken apart a PS4 before? If so, do you have any tips? I’d love to hear from you below!

2 thoughts on “7 Fixes & Guide: Why is My PS4 Fan so Loud for Certain Games?”
I found the ps4 pro heatsink to be damaged during manufacturing. Mine was loud out of the box new. I lapped the cooler die its whisper quiet now. I can provide proof in a pic.
I bought my first ps4 about a year ago second hand. I was the fat model. I got it quite cheap, since the previous owner said it’s making alot of noise. So I fired it up and quickly the ps4 started to sound like a jet engine while in home screen. I powered it off and took it apart. I couldn’t believe how much dust there was inside. The heatsink was all covered in dust. It was just insane. After a good clean and new thermalpaste things started to look better, much better. But still after playing Warframe, in certain situations the noise level was quite high. I did some google search and found out the some quys where putting a another heatsink on top the ps4 heatsink with good results. So I decided to cut an ugly hole to my ps4 cover exposing its heatsink. Then I attached a leftover gpu heatsink on top of the ps4 heatsink with 120mm fan. I soldered the 120mm fan’s wires to ps4 own fan wires. No the sound levels stayed pretty decent. I think it is still pretty amazing how nice some modern titles look on a 10 year old console! Long live the good old fat ps4 😉