I’ve found people often don’t use mass loaded vinyl correctly in their soundproofing projects. Although it might not seem like the most difficult material to work with, knowing how to install mass loaded vinyl properly takes a bit more thought than you might expect.
It also doesn’t help that there’s not loads of clear information available on how to do this. So, to save you from having to pay a professional, here’s my guide on how to hang mass loaded vinyl on walls, ceilings, and floors.
Before we jump into the steps, I recommend checking out my article covering does MLV work. It should answer any questions you might have about whether it’s the right material for your project.
Steps to Install MLV on a Wall
Based on my experience, I feel it’s easiest (and most effective) to install MLV on a wall. Of course, it’s still useful if installed on a ceiling or floor. But this is also the easiest way to explain the basic steps of mass loaded vinyl installation. So read through these steps before jumping to the below sections for different parts of a room.
Equipment
For mass loaded vinyl installation, you’ll need the following equipment:
- Pneumatic cap stapler (such as this)
- Nail gun (or hammer and nails)
- Utility knife
- T-square
- Tape measure
- Acoustic sealant (such as this)
- Putty pads (such as these)
And, of course, you’ll need your mass loaded vinyl. Figure out the density and coverage you’ll need before starting the project – you can find out more information in my other article.
Method
The method below works on the assumption that you’ve removed the wall’s existing drywall (or that it was never installed). You need access to the studs for this method. If you’re just installing over a layer of drywall, you’ll only need to measure and staple the MLV.
1. Prepping the Wall
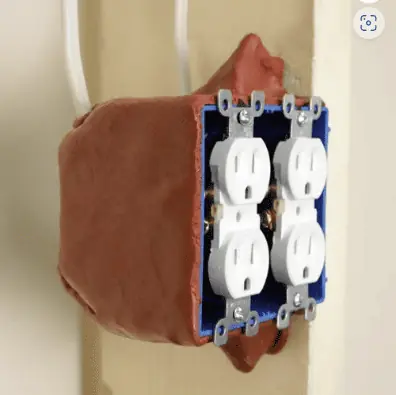
First, identify where (and how many) electrical outlets are in the wall. Use putty pads on each one to create a soundproof barrier. Other than this, you’ll want to ensure your wall studs are exposed and in good condition. If you plan to insulate the wall cavity, now is the time to do it.
2. Prepping the MLV
Measure the height of your wall – this’ll be the length needed for cutting the mass loaded vinyl. Subtract 1/8-1/4” from the total height to allow for a perimeter gap.
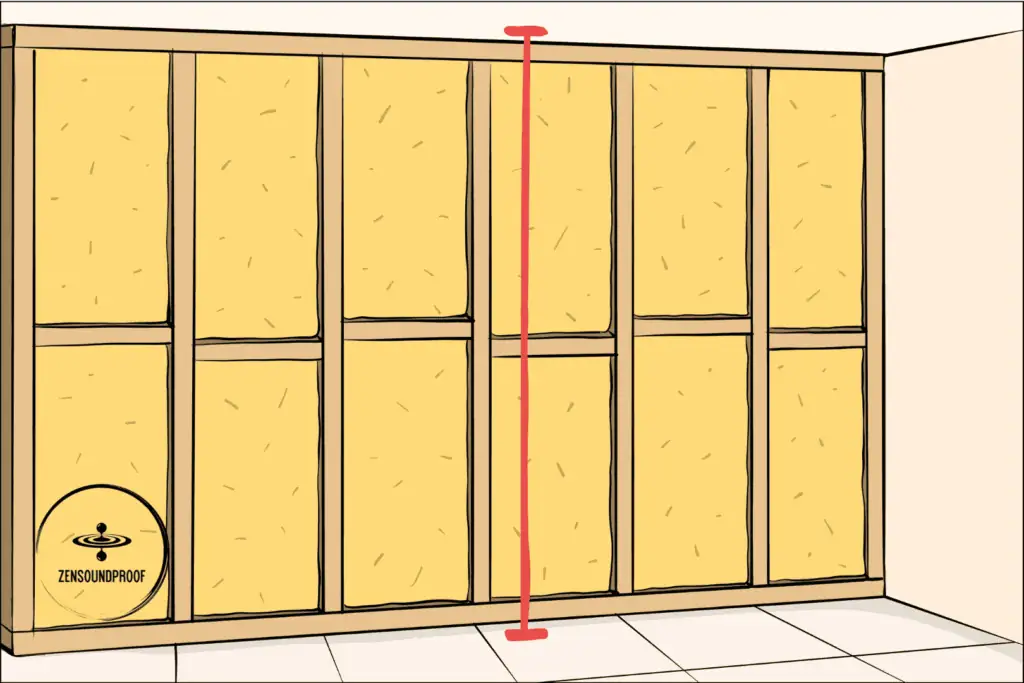
Cut your MLV using a utility knife and T-square to ensure your cuts are straight. Use the wall’s width to work out how many lengths (drops) of mass loaded vinyl you’ll need for the whole wall.

3. Positioning and Fastening the MLV
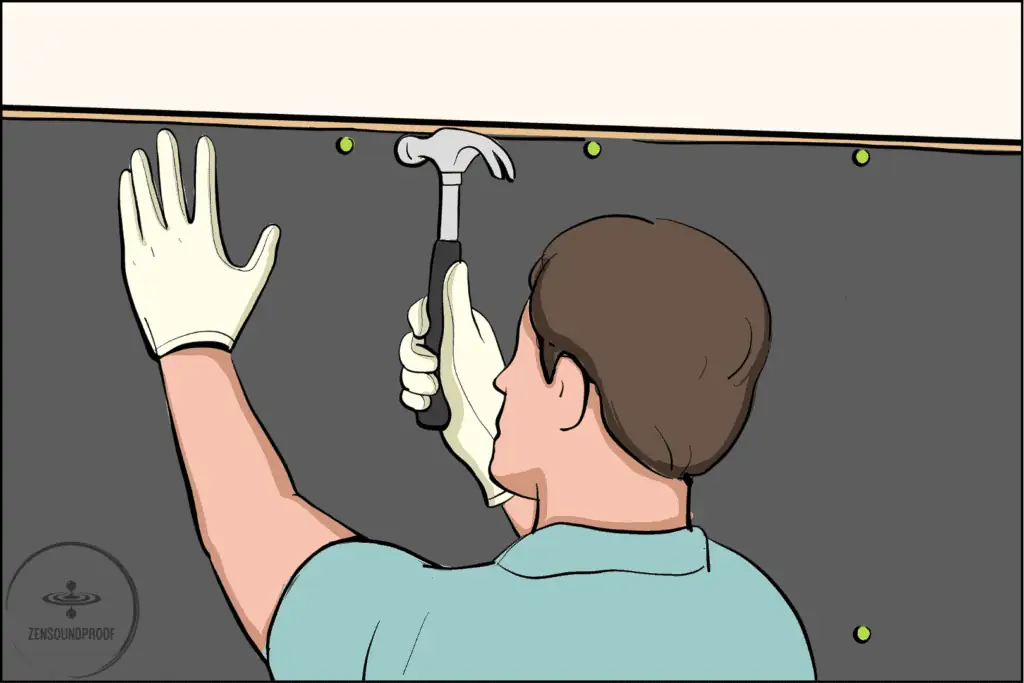
You’ll need a helper for this step. Take a length of MLV and position it against the first wall stud (working from left to right). Leave a small gap at the top and hang the MLV to check it’s straight and draping correctly.
Shoot a staple into each top corner of the MLV – your helper should be supporting its weight. Then staple it along the stud every 8” down its length. After a few staples, your helper should be able to let go. Fit it to the top and bottom plate before working down the sides.
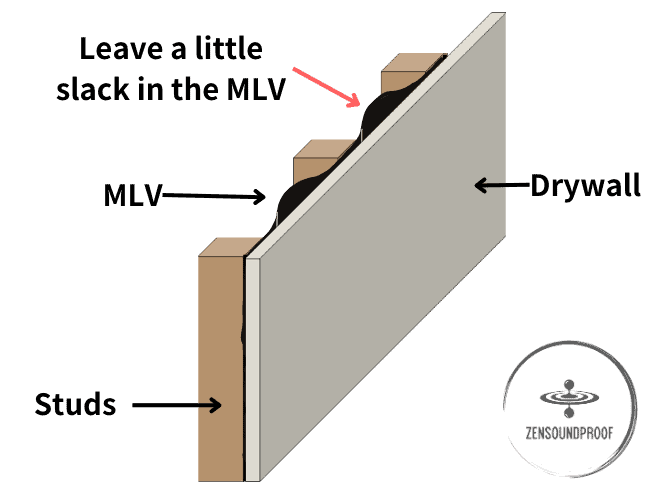
When fastening the MLV to the wall, don’t pull it too tight. You want it to have a bit of looseness in it so it can retain its limp mass properties. You’ll lose these if you pull it tight.
4. Seaming the MLV
Unfortunately, it won’t be possible to get all the seams in the same places. As such, you’ll need to deal with seams both on studs and between studs. The steps for both are pretty simple, so work with the seams as you’re covering the wall.
When the seam meets on a stud, simply butt the 2 sheets together. This means getting the edges to touch without them overlapping – you want the seam to be as tight as possible to create an effective sound barrier.
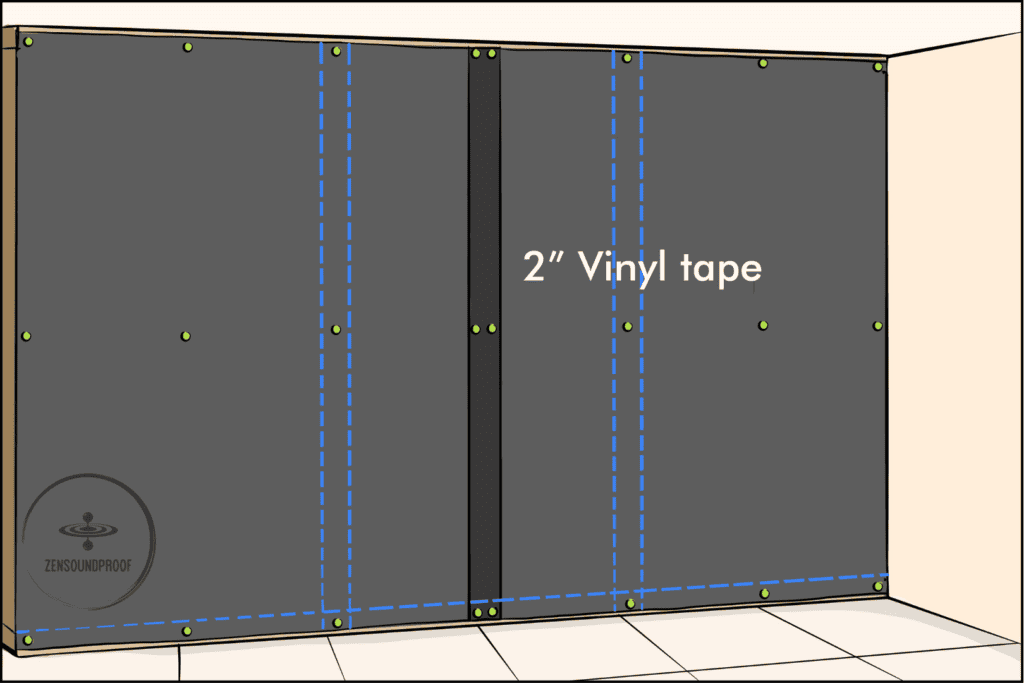
When the seam meets between 2 studs, overlap the MLV by 2”. You can seal this seam using acoustical sealant, but it’s much easier to tape the sheets together with some vinyl tape (like this).

To recap, the seam will have 2 layers of MLV plus vinyl tape.
- At the framing level, you must trim off the overlapping MLV layer. Because this will affect the drywall installation later.
- When the seam is leaning on the wall insulation, the softness of the insulation can absorb the extra thickness of the 2 layers of MLV.
To get the sheets flush enough when taping, you might want your helper to hold them together while you add the tape. Also, you’ll want the tape seams to be as flat as possible.
5. Finishing Touches
Repeat this process until you’ve covered the entire wall (or walls). Cut around any electrical outlets, leaving a small perimeter of 1/8” or less. You can seal this later with acoustic caulk.
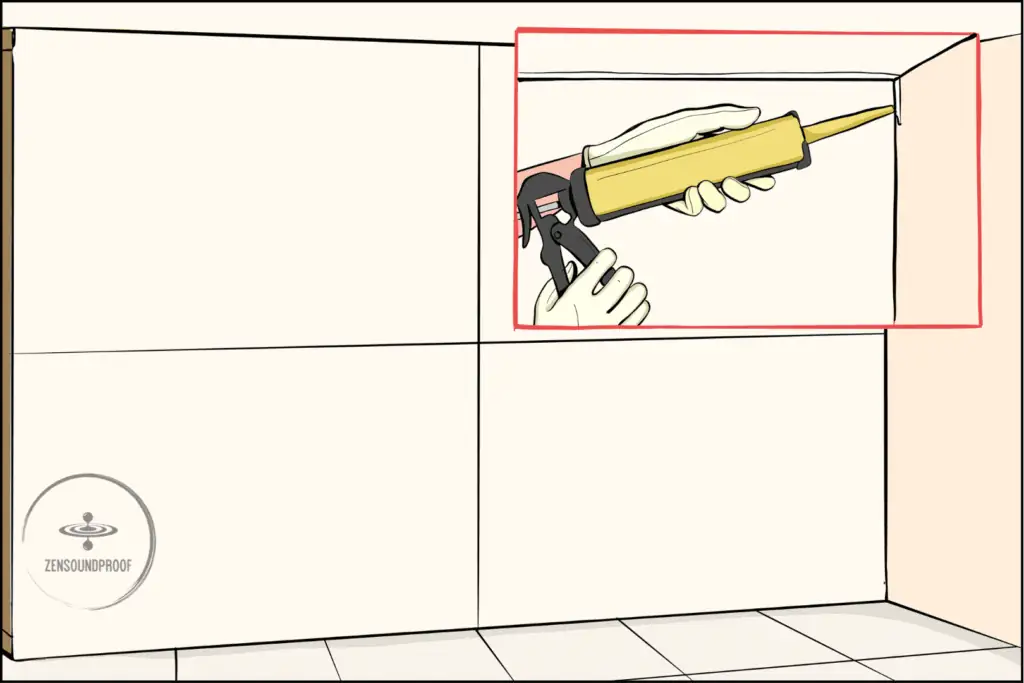
In fact, this is the next job. Use acoustic caulk to seal the edges of all your MLV sheets at the top and bottom. Seal any butted seams with it too, and any penetrations (such as around doors, windows, outlets, etc.).
6. Hanging Drywall
Finally, you need to hang the outer layer of drywall. Measure and cut the drywall as you would for any installation job. You’ll need to put screws through the MLV to fix the drywall in place.
After you’ve hung all the panels, you’ll need to caulk the perimeter again. Then, mud the seams using drywall mud. Again, this step is the same as any drywall installation process, so it doesn’t require much explanation here.
Alternative Installation: Weaving Between Staggered Studs
The method above is for standard wall studs – a single line of wood studs. However, if your wall has staggered studs, which is ideal for decoupling, you have an alternative option for sound blocking.
This process should be fairly self-explanatory. The mass loaded vinyl sheet is woven through the middle of the stud setup, meaning it’s always fixed to the inside of each stud in an alternating pattern. You can refer to the diagram below for a clearer idea.
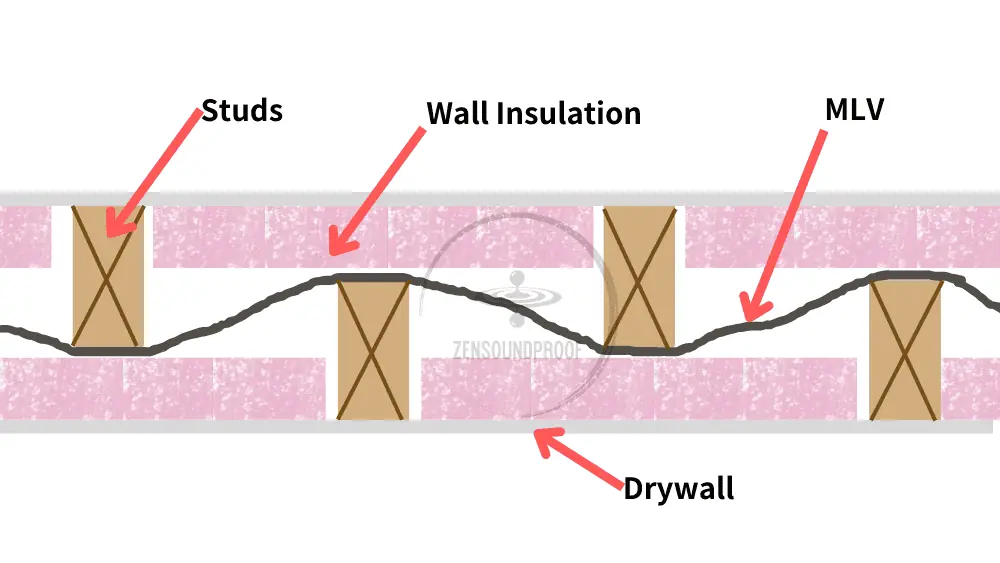
Seaming the panels is pretty much the same for this method. You’ll want to either butt them against each other on the studs or overlap between studs and seal them together.
There doesn’t appear to be much difference in soundproofing performance when installing the MLV this way. It’s up to you which method you use, although I’d say it’s probably easier to install it on the outside of the studs. Plus, this frees up the wall cavity for insulation.
How to Install MLV on a Ceiling
Option 1: Unsurprisingly, installing MLV on a ceiling isn’t drastically different to installing it on a wall. The most common option is to fix it to the ceiling joists with insulation in the cavity. To do this, just follow the steps above – it’s pretty much exactly the same method.
Option 2: However, another option is to install the MLV sheet above the joists. This means it’d go between the subfloor of the room above and the ceiling/floor joists.
If you’re doing it this way, make sure you add an extra inch or so to the overall length of the MLV. You want it to remain a bit limp rather than pulling it tight. This allows it to retain its viscoelastic properties.
You’ll probably need your helper to support the MLV for longer when installing it on a ceiling because you’re working against gravity. Work along the length and it should support itself once you’ve finished one side.
How to Install MLV on a Floor
The final place you can install mass loaded vinyl is on a floor. For this option, you’ll be installing it above the subfloor but below the actual flooring. As such, you won’t really need to fix it in place, although you can still staple it to the subfloor if you wish.
It’s worth noting that installing MLV on a floor is the least effective location for it. You’ll lose its limp property that blocks sound because it won’t have the ability to hang in the same way as on a wall or ceiling. It’ll therefore only be adding mass, although this does still block additional airborne sound.
However, through my practical knowledge, I’ve found soundproof underlayment to be a far better option for floors. This is because it insulates against impact sounds and, to a lesser degree, airborne sounds, whereas MLV only works against airborne.
I recommend checking out my article on the best soundproof underlays if you’re insulating a floor. It provides far better results and is generally a more cost-effective option for this job.
Must-Dos for Installing Mass Loaded Vinyl
Once you’ve got the basic method down, installing mass loaded vinyl is no more difficult than any other construction DIY job. However, there are some tips worth considering to get the most from this material.
Here are what I consider to be the most important based on my experience working with MLV.
Don’t Forget the Acoustic Sealant
It’s impossible to overstate how important acoustic sealant is for this job. Tiny gaps between MLV sheets might not seem like a big issue, but they can lead to a surprising amount of sound leakage, especially when you add them all up.
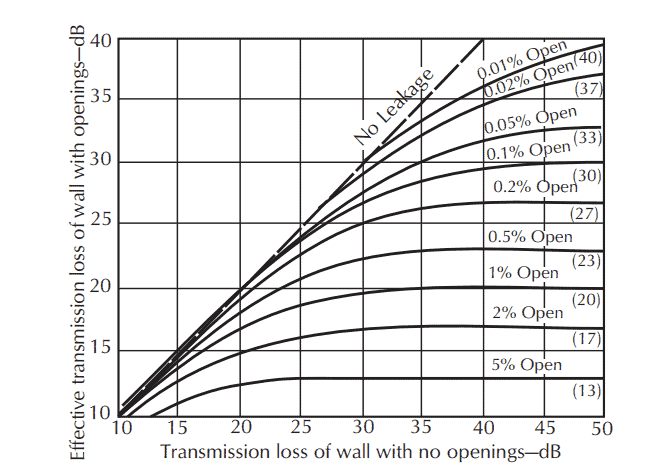
For example, if you have a wall that’s 100 sq. ft. and you leave 1% unsealed or open (such as around a door frame or electrical outlet), it equates to 1 sq. ft [1].
Because of this unsealed area, a perfect wall that would block 40dB, would end up blocking only 20dB [1].
This significant amount of sound leakage for such a tiny opening highlights how important proper caulking is.
The bottom line is that installing mass loaded vinyl is basically an expensive waste if you don’t bother sealing all the gaps because sound waves can fit through very small gaps.
Leave Enough Slack
As I’ve mentioned above, MLV needs some slack to retain its limp mass properties. There’s not really a set amount for how much slack you need to leave to achieve this, though. Just make sure the sheets aren’t pulled tight and you’ll be fine.
The easiest way to test whether your MLV is slack is to hit it. It should respond with a dull thud rather than a sound similar to a tight drum skin. This might sound a bit vague, but you’ll know exactly what I mean when you hear it!
Work Out What Noise You’re Blocking
You should probably do this before you start on this project, but work out whether you’re working against airborne or structure-borne noise. Generally, MLV is best for airborne noise because it adds mass to a wall or ceiling, meaning it’s harder to vibrate.
Structure-borne noise, such as footsteps, is best combatted through sound decoupling using resilient materials. An example of resilient material is the above-mentioned soundproof underlay.
Combine MLV with Other Options
On its own, mass loaded vinyl can help reduce sound transmission. However, you can achieve far greater results by combining it with other soundproofing materials. For example, in the methods above, I recommend using acoustic caulk. This is another soundproofing material.
Green glue
As I demonstrate in my other MLV article, Green Glue noiseproofing compound makes a massive difference. It provides sound damping and can drastically improve the STC (sound transmission class) value of a wall assembly.
Resilient or hat channels
Another very effective option is to use resilient materials, or sound decoupling. Resilient channels or hat channels can provide a decent amount of sound decoupling with minimal extra effort. Both are fairly easy to install and achieve similar results.
Mineral wool or Fiberglass
Filling the cavity with something like fiberglass or mineral wool insulation helps prevent cavity resonance and provides some level of sound absorption.
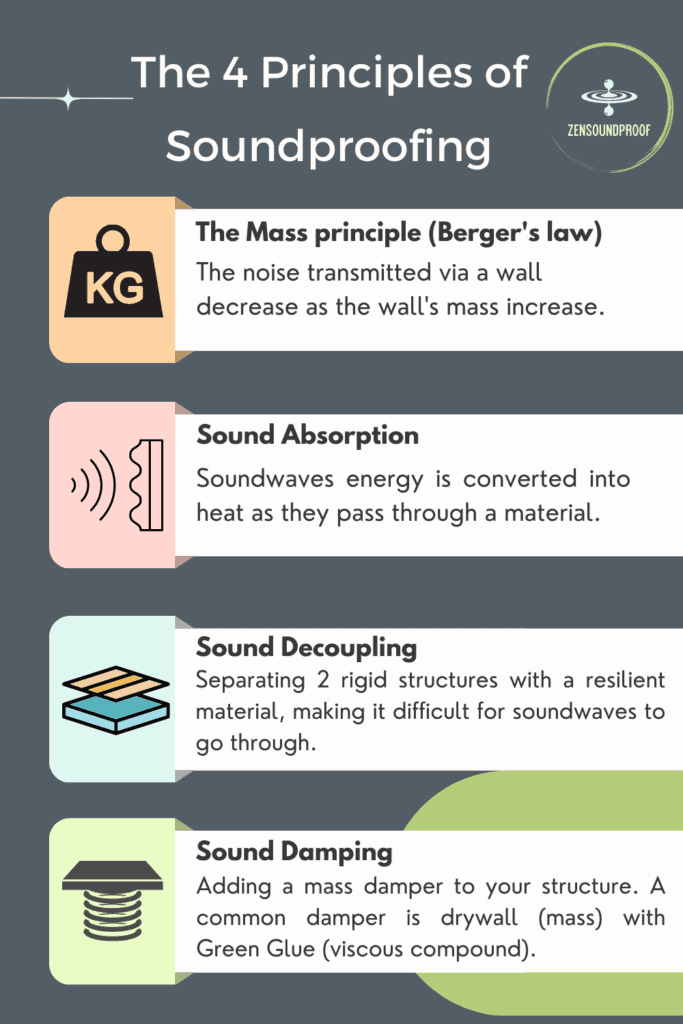
Plus, you can use them alongside MLV if you choose. The bottom line is that soundproofing relies on 4 overall principles, and combining them is the best way to achieve actual soundproofing.
Even if you don’t plan to go as far as decoupling a structure, don’t underestimate the importance of cavity insulation. Much like acoustic caulk, insulation should be a standard material used in any soundproofing project.
Final Thoughts
As you can see, installing mass loaded vinyl isn’t a particularly complicated job. Provided you do the right prep, hanging sheets of mass loaded vinyl should be fairly quick.
Of course, these methods are only suitable for household projects. If you plan to install MLV in a vehicle, you’ll need a completely different guide.
Do you have any other tips for installing mass loaded vinyl? If so, drop them in the comments below!
