Having lived in various hot countries, I’ve come to appreciate the benefits of the humble ceiling fan. However, keeping them in almost constant operation has also taught me the necessity of knowing how to fix a noisy ceiling fan.
After all, the last thing you want when trying to keep cool is a constant clicking, buzzing, rattling or grinding noise.
If you’re dealing with a ceiling fan making noise, this guide should help you out. I’ve compiled a list of typical ceiling fan noises and how to identify them. Then, I cover how to troubleshoot and fix them, so hopefully you can get your fan nice and quiet again.
How to Identify Different Types of Ceiling Fan Noise
The best place to start is by carefully listening to your fan and figuring out what type of noise it’s making. To do so, try and get your room as quiet as possible, as this’ll allow you to listen to the fan and hopefully narrow down the source.
Some examples of fan noise include:
- Clicking noise: loose screws, blade arms or light kit
- Grinding noise: worn out or dry bearings
- Buzzing noise: faulty wiring, loose connections, or dimmer switch
- Rattling noise: loose ceiling fan canopy, downrod or motor housing
Generally, types of noise can be subjective. However, we’re lucky when it comes to types of fan noise because they’re all fairly distinctive. Listening carefully to the fan will help you identify the general type of noise, which you can then use to narrow down your options for fixing it.
Is the Noise Coming from the Fan or Light Kit?
Some ceiling fans have a light kit fitted, which can be another source of noise. It should be obvious whether your fan has a light kit because it’ll have a light on it. By extension, the fan power switch should have 2 switches: one for the fan and another for the light.
The light kit can also become loose or faulty, so follow this simple test to determine which is causing the noise:
1. Turn on the fan and light and listen for the noise.
2. Turn off the light but keep the fan running. Listen for any changes in the noise.
3. If the noise stops or changes when the light is turned off, then the problem is likely with the light kit.
4. Conversely, if the noise doesn’t stop or change when the light is off, then the problem is likely with the fan.
Based on the noise examples I’ve given above, you can also use these to narrow down the source. For example, the light kit won’t necessarily make grinding or rattling noises, but could still cause buzzing or clicking sounds. Either way, it’ll be worth doing this quick test just to make sure.
10 Tips to Fix Each Type of Ceiling Fan Noise
Before jumping into the tips, we must first make the fan safe to work with. To do so, you should ensure the power to the unit is completely off by switching off the relevant fuse in your fuse box. Turning it off at the wall switch won’t be enough, especially if there’s a risk of loose wiring.
Also, make sure you’re using an appropriately-sized ladder. A step ladder is the most obvious choice, and ensure you’re high enough to work on the fan safely without having to stretch or over-extend.
Now that we’ve covered the basic safety tips, let’s go over how to fix various problems that cause ceiling fan noises.
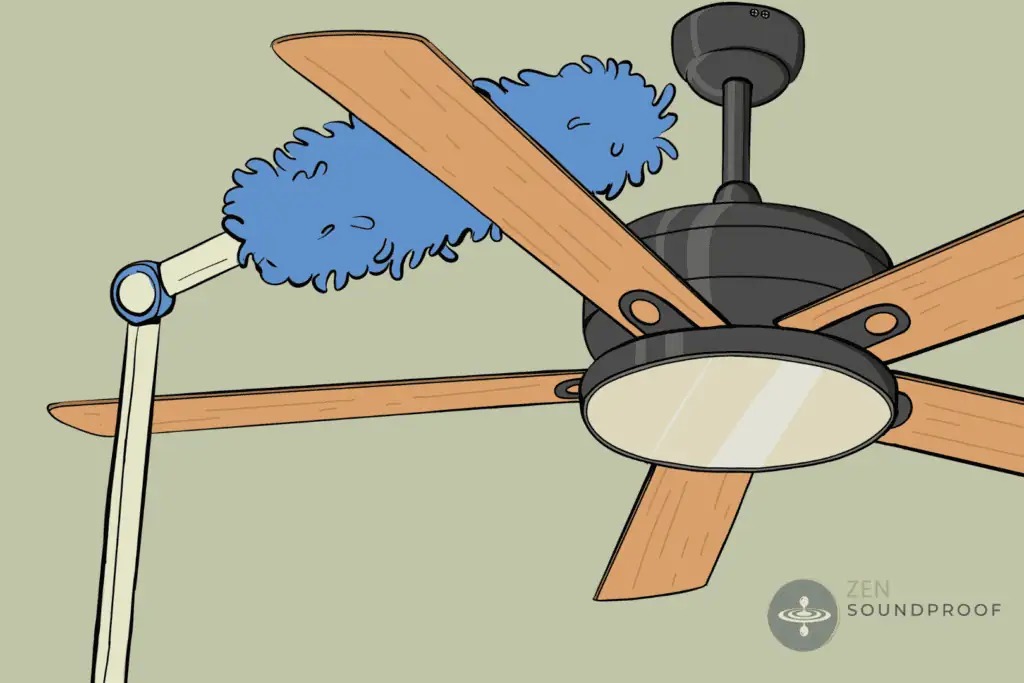
1. Cleaning the Blades
The best place to start is by cleaning the fan’s blades. Doing so helps prevent imbalance, which can lead to clicking and rattling. Over time, imbalanced blades can cause other components to become loose.
Cleaning dirty fan blades is pretty easy. First, wipe them down with a dry cloth to remove loose dust. Next, clean them with a damp microfiber cloth and warm, soapy water. This helps remove any grease or caked-on dust, which can happen in kitchens.
You could also try using cotton swabs to get in any small gaps, especially if the fan blades are particularly dirty. Give them 15-20 minutes to dry before switching back on.
Ideally, you should clean each fan blade every month or so as a preventative measure.
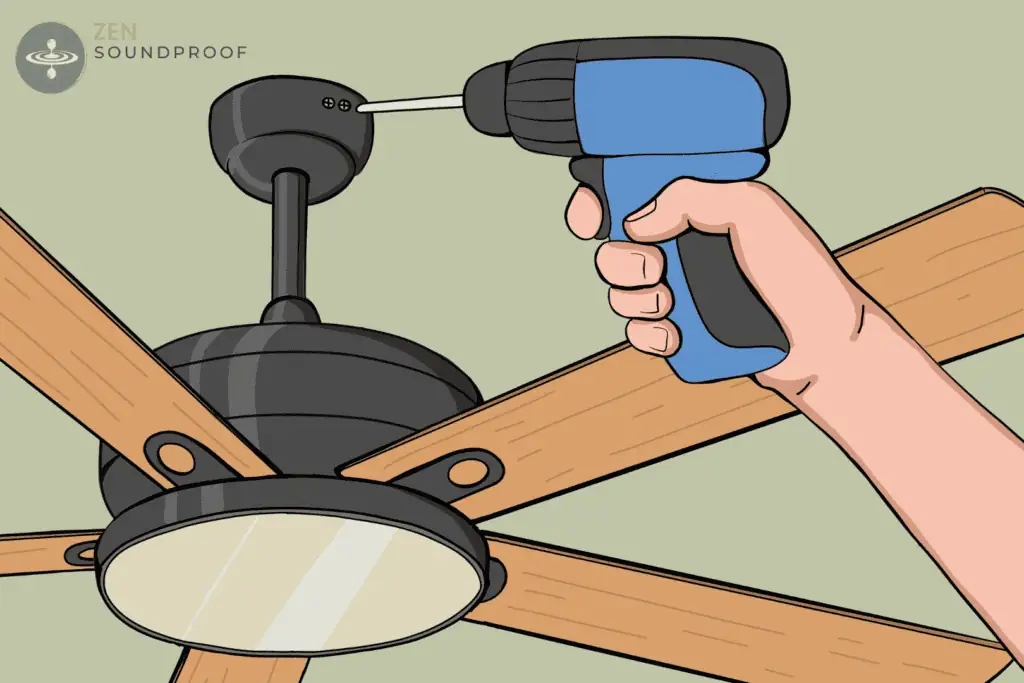
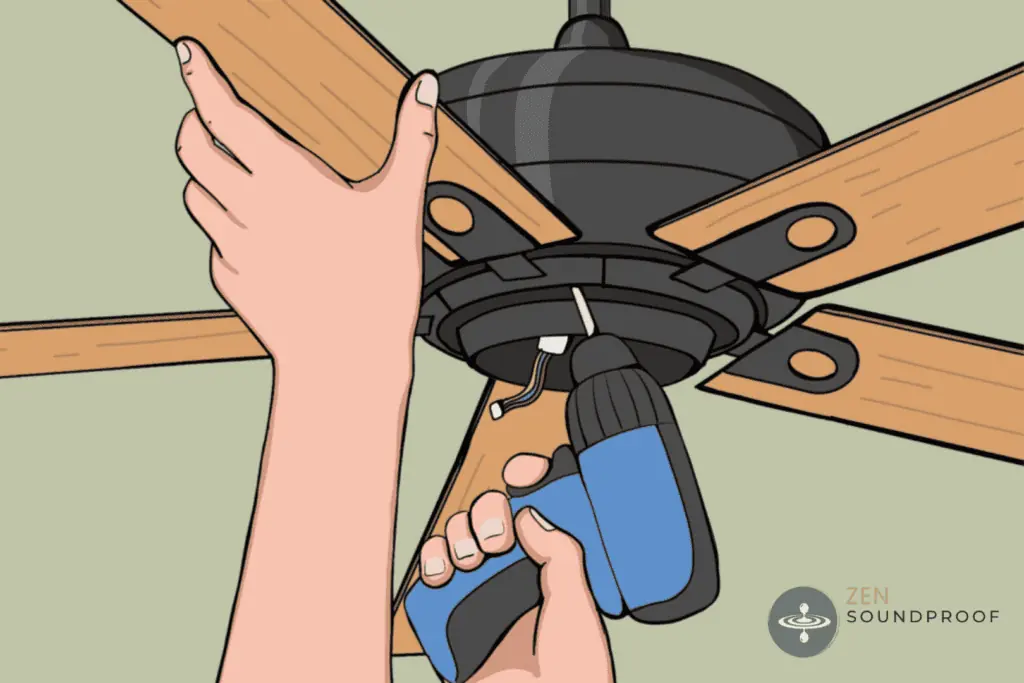
2. Tighten Screws
The next easiest issue to resolve is loose screws. Depending on what component has come loose, they can lead to clicking and rattling sounds. Areas you’ll want to address include:
- Fan blade screws
- Blade arms
- Light kit
- Downrod
- Motor housing
Bear in mind that you might have to remove some components to reach certain areas, such as the motor housing and downrod. Refer to your product’s assembly instructions to know how to take it apart and put it back together.
3. Inspect Blades for Damage
Over time, fan blades can become bent or damaged. It can happen through general wear and tear but issues such as imbalanced blades or worn bearings will make it worse. Damaged or bent blades will likely make a whooshing noise due to changes in airflow, but you might also experience rattling.
It should be fairly easy to see if the blades are broken or damaged. You might have to go through tip 4 to identify minor signs of damage, but bent or broken blades will be obvious. If you spot any issues, replace broken or warped parts with matching ones.
4. Balancing Blades
Even a clean and correctly-functioning ceiling fan can end up with imbalanced blades. It can be caused by wear or dirt buildup and results in clicking, rattling and whooshing sounds.
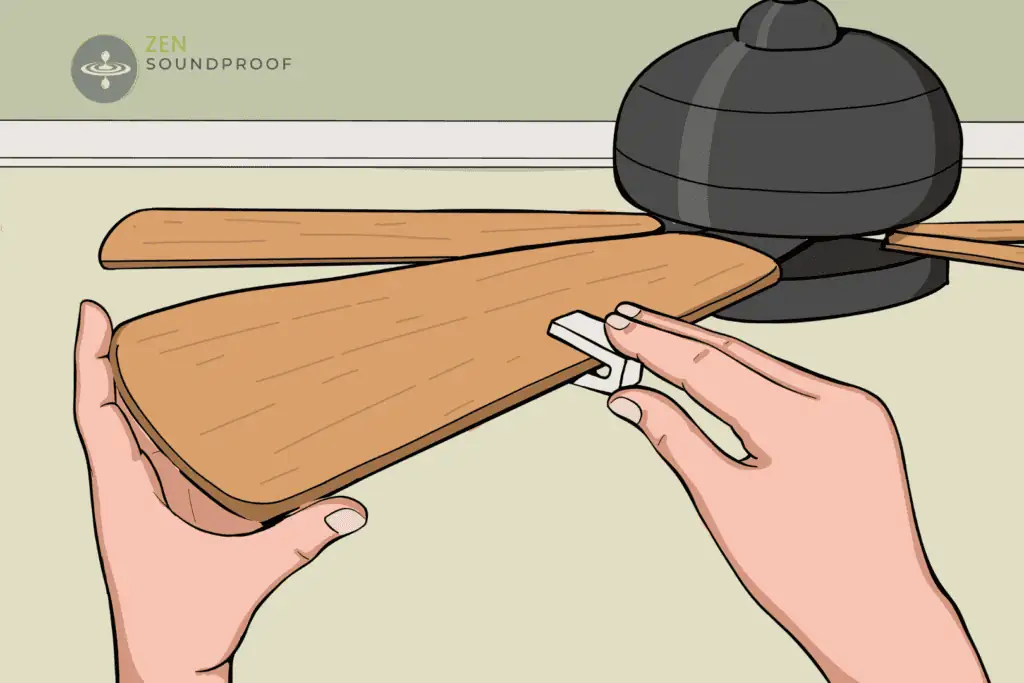
Balancing ceiling fan blades isn’t too difficult, but you’ll need a ceiling fan balancing kit (such as this) designed for the number of blades on your fan. To balance fan blades, do the following:
1. If possible, identify how many blades are imbalanced, and which they are. To do so, attach the plastic clip from your kit to the blade about halfway up. Turn the fan on to check if it’s better or worse, and repeat until you find the problem blade.
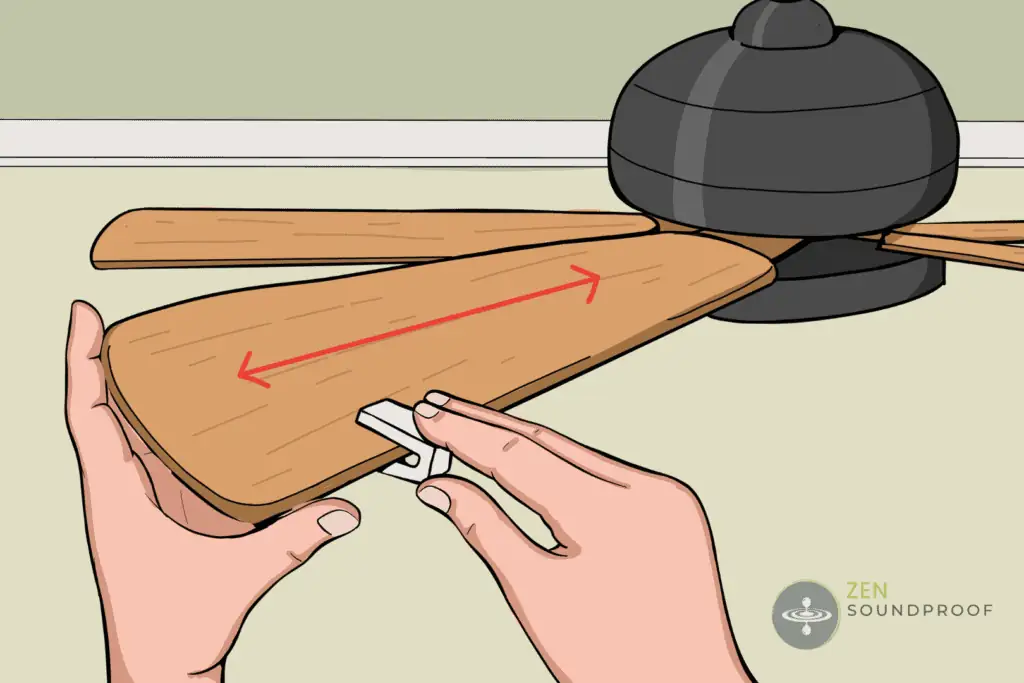
2. Once you’ve identified the problem blade, begin moving the clip along its length by about an inch each time. This is to determine where on the blade you must balance it.
3. Next, attach a balance weight using the adhesive backing in the center of the blade at this position. Repeat this process until you’re happy with the fan’s operation.
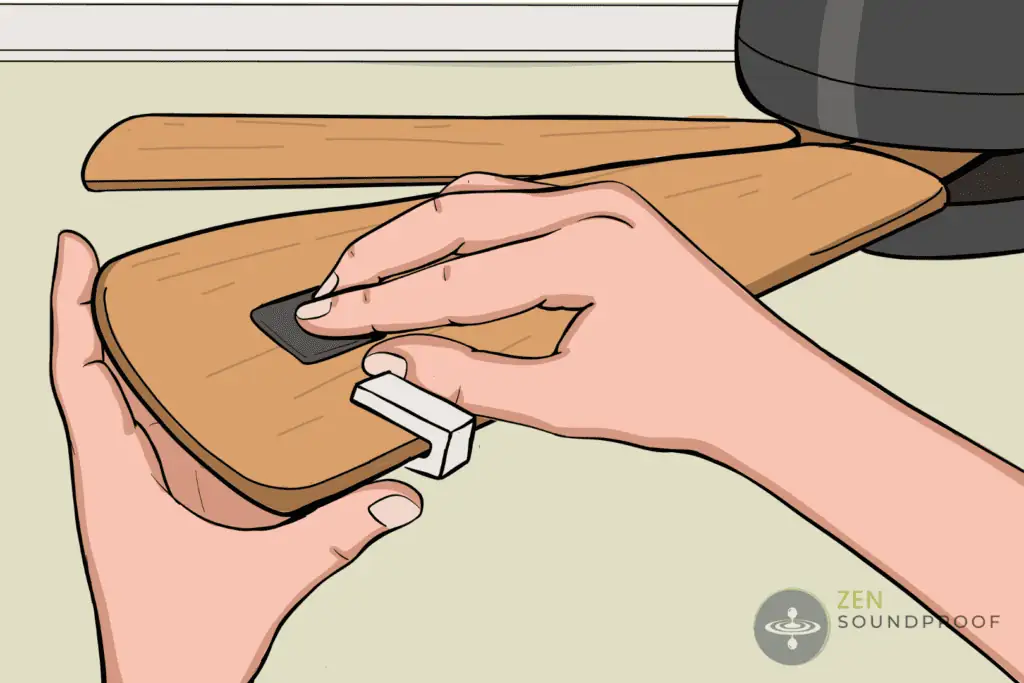
You should test the fan at different speeds as you go because some imbalance issues might only become obvious at a higher fan speed. Also, bear in mind that you might need to use more than one weight per blade.
You can check out this video for a visual guide.
5. Lubricating Components
Dry bearings can result in a grinding noise as components rub together. Generally, it should only be the motor or bearings that need lubrication, and it’s not a super difficult job.
However, bear in mind that some fans will have sealed bearings, but these shouldn’t need lubricating. The reason they’re sealed is to contain any lubricant added during production.
To lubricate the bearings, remove the fan from the ceiling and get to the motor housing. Some may have an oil hole specifically for this purpose, so have a look for that. Drop in 3-4 drops of fan oil (such as this), let it rest for 5-10 minutes, and put everything back. Test to see if the noise has disappeared and apply a bit more oil if not.
6. Motor Housing Obstructions
If you notice a rattling or scraping noise, it could be because something is obstructing the motor housing or fan blades. Check around the fan, including the pull chain, motor housing, and downrod, to see if there’s any debris.
Remove anything you notice during your inspection. If you can’t see anything, it might be the motor housing itself that’s obstructing the blades. You can remove it and reattach to see if this solves the issue.
7. Check Electrical Connections for Damage
This tip might be a bit too advanced for some people. While it’s not especially complicated, messing around with wiring in the home can be a bit more dangerous than the other tips mentioned so far.
But if you think it’s worth a try, start by inspecting the electrical connections and wiring. You might need to take the fan down to have a look at the ceiling connection, and take the switch off the wall to see what’s going on there. If you notice any issues you can fix, use wire nuts or electrical tape.
The easiest (and most common) electrical issue is attaching a ceiling fan to a dimmer switch. Like other electrical problems, this results in a buzzing or humming noise. It’s usually caused by using non-dimmable equipment on a dimmer switch, such as a ceiling fan. Simply replace the wall switch with a regular one and the issue should be resolved.
8. Check the Motor for Wear
An old or worn-out fan motor could cause anything from buzzing and rattling to grinding noises. It’s something that’ll happen over time regardless of how well you treat your fan, but an especially worn-out motor will also overheat. This is a fairly obvious sign that the motor is the problem.
Take the fan down and expose the motor. Look for signs of wear or damage, which could include obviously broken parts, discoloration, melting, and funny smells. If you notice any of these problems, you’ll need to repair or replace the motor itself.
Obviously, compare the price of the replacement motor with the price of a new fan. In your decision, you should also factor the age of your fan.
9. Check for Vibrations
Ceiling fans can cause vibrations through their standard operation, even if they’re well mounted. The spinning action creates “waste” energy in the form of vibrations, which can become amplified as they pass into your home’s structure.
Ideally, you’ll want to avoid mounting the fan on a loose or hollow surface, as this’ll just make the problem worse. Of course, it might be too late for that, but there are things you can do to resolve it.
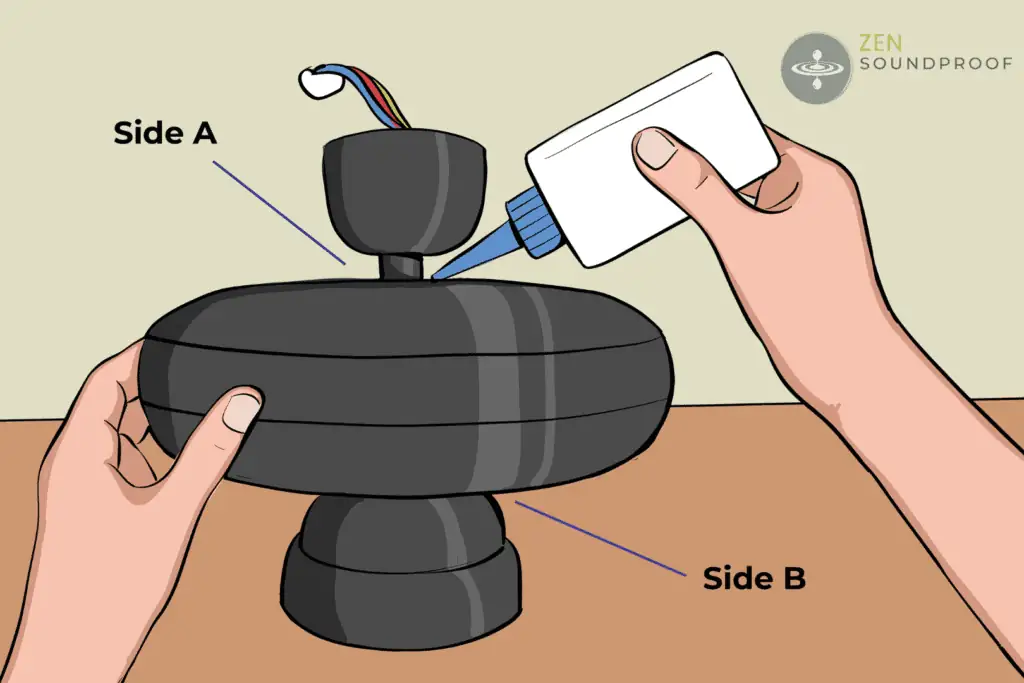
One option is to add some padding around the fan’s ceiling mount. This should help dampen vibrations before they pass into the ceiling. Another option is to insulate the ceiling itself to reduce amplification in the cavity space.
To pad the ceiling fan connection, you could use EVA foam or acoustic damping foam.
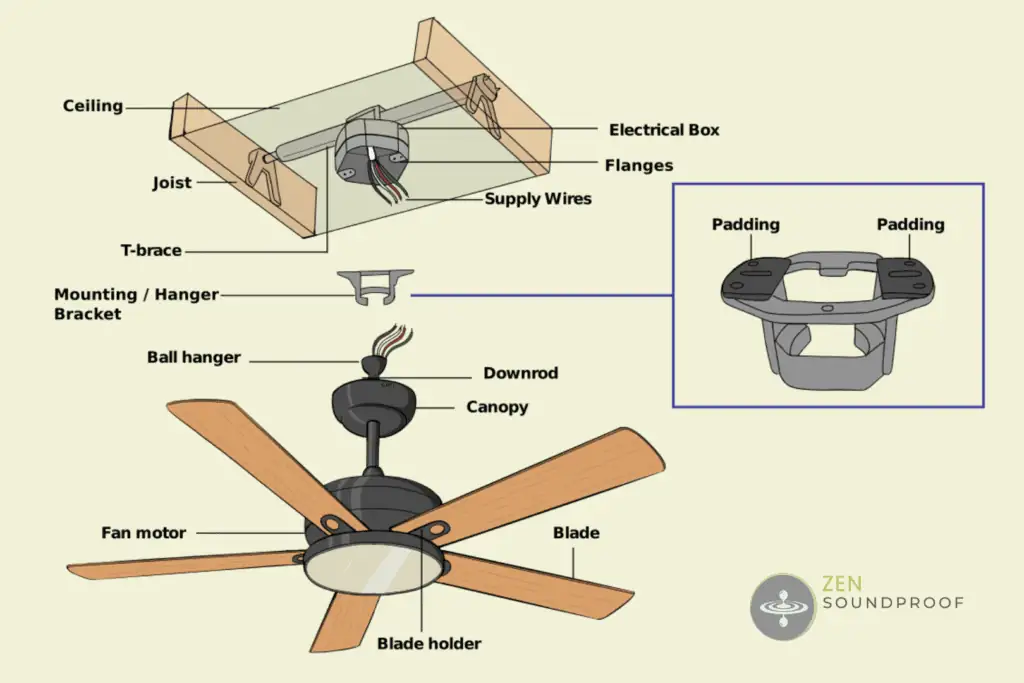
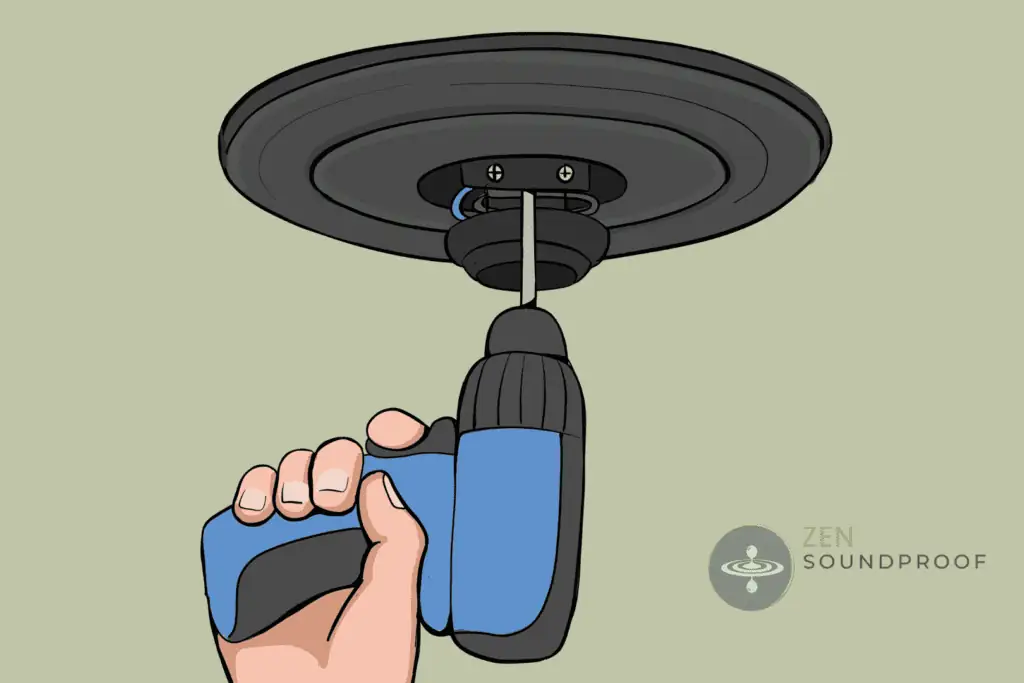
10. Evaluate the Fan’s Installation
Many issues with mounting, vibrations, and unbalanced blades can often be traced back to improper ceiling fan installation. Refer back to your fan’s installation guide to check everything was done correctly. If you don’t think you’ll be able to tell one way or the other, consider bringing in a professional.
One vital thing to check is whether your fan is compatible with your ceiling type. While you can install a fan in any ceiling, you need to check things such as support beams, ceiling material, mounting equipment, etc.
Installing the fan between joists.
If you plan to install between joists, you might want to use a brace kit. It’s a rod that’s installed between 2 joists and holds a support box in the middle.
Don’t think of reusing a light fixture support box to hold a ceiling fan instead of an actual ceiling fan support box. It’s a big no-no.

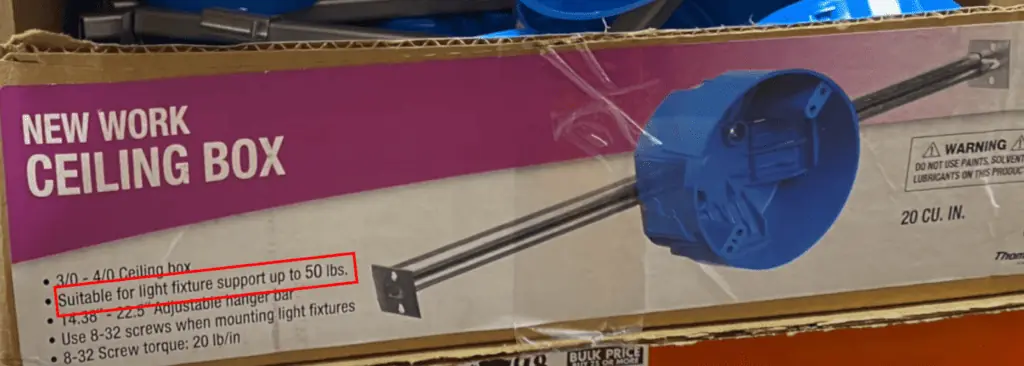
Ceiling fan fixture boxes are rated to support higher weights (including dynamic loads, like variable speed rotation), while light boxes are only meant for static loads and lower weights.
Installing onto a joist or concrete ceiling
You can also screw the ceiling fan hanger bracket directly :
- to the wood joist using this kind of support box
- or directly to a concrete ceiling but without any need for a support box.
When to Call a Professional
On that note, sometimes it’ll be worth accepting that you might not be able to identify or solve a problem. If advanced noise problems persist, or you’re unable to fix it yourself, it’ll definitely be worth calling a qualified fan engineer.
While issues such as imbalanced blades or dry bearings are fairly easy to solve, it might be worth staying away from electrical-related problems. As mentioned, things can go quite badly if you get it wrong. If you believe you’ve identified an electrical issue, call an electrician.
Of course, you’ll know where your limit is regarding DIY jobs. Just make sure you’re not doing anything dangerous, and be prepared to spend a bit of money if you call someone out.
Fix Noisy Ceiling Fan (Related Questions)
Can You Spray WD40 on a Noisy Ceiling Fan?
You shouldn’t use WD40 on a noisy ceiling fan. WD40 isn’t an oil-based lubricant. Rather, it’s a solvent-based product, meaning it can damage motor parts rather than lubricating them. Make sure you buy a detergent-free, oil-based lubricant that’s ideally designed for ceiling fans or motors.
When Should I Consider a New Ceiling Fan?
To determine whether you should repair or upgrade your ceiling fan, start by assessing its age and quality. The general lifespan of a ceiling fan is 10 years, so if it’s younger than that, a repair might be worth it.
Of course, you’ll also want to consider the actual problem. For example, if it’s something minor like unbalanced or dirty blades, or dry bearings, you can fix these cheaply. But if it’s something like a damaged motor, this’ll cost more. Compare potential costs (and the fan’s age) against the price of upgrading to a new fan.
However, older or cheaper fans will be more prone to noise issues. Upgrading to a newer fan can help with noise problems and performance/energy efficiency. I’ve got an article that recommends some great quiet ceiling fans, so check that out.
Final Thoughts
I hope this article has given you some good advice on how to identify and resolve a noisy ceiling fan.
In my experience, most issues can be fixed with a bit of straightforward DIY. However, if you don’t feel confident, or recognize it’s a more complex issue, make sure you call a professional.
Do you have any other tips for troubleshooting and fixing noisy fans? If so, drop them below!
